Version 1.15 makes sure Macro Stream SD stays compatible with changes to components in its eco-system. The Stream Deck XL revision 2 is supported in this version. Thanks for using #frostboxlabs tags on social medier.
Go to the product page here
Version 1.15 makes sure Macro Stream SD stays compatible with changes to components in its eco-system. The Stream Deck XL revision 2 is supported in this version. Thanks for using #frostboxlabs tags on social medier.
Go to the product page here
Macro Stream stays current and with the new 1.14 release supports the newest Raspberry Pi’s that needed a newer kernel. We love to see #frostboxlabs tags on photos from shows around the globe so please keep’em coming
Go to the product page here
Happy new year to all my friends and clients 🙂
This is a small announcement for SSL Sigma users and it is only preliminary info!
>>>>>>>>>>>>>>>>>>>>>>>>>>>>>>>>>>>>>>>>>>>>>>
Use the motorised faders on your MCU controller to control multiple SSL Sigmas as if they where one giant summing mixer with full 2-way communication. It is the missing link for your SSL Sigmas.
PolySigma is a custom software tool that acts as a gateway on your network between up to 4 SSL Sigmas and a 16fader MCU controller using two ipMidi ports. The 4 Sigmas show up with names and rounting info in LCD scribble strip each having a 16 fader bank for that units 16 channels. Bank 5 is for master faders A+B for each of the Sigmas. The software runs on a Raspberry Pi mini computer on your normal network and it does not interfere with internet or other network activity.
It currently provides 2-way control of faders, pan, solo, mute, stereo/mono, rounting to bus A/B, master faders A & B and send Mix B to Mix A.
This control set can easily be expanded to all Sigma functionality including control room controls and a connections to a DAW for automation and recall is under development. The software replaces the original SSL Remote Control App and is based on reverse engineering the network protocol between this software and the hardware unit and therefor have access to the entire feature set.
The software is not available for release yet and only tested for the SSL Matrix as a 16 fader MCU controller. The software is created by Frostbox Labs ApS on behalf of a private client.


Macro Stream stays current and supports all new revisions of the systems hardware components now including the new Stream Deck mk2. We love to see #frostboxlabs tags on photos from shows around the globe so please keep’em coming
Go to the product page here
Macro Stream stays current and supports all new revisions of the Raspberry Pi 4b with the release of v1.12. We continue to keep our products up to date and thanks everybody supporting us by buying our software.
Go to the product page here
This new revision takes the A80 remote system even further in provided a full featured solution for a modern A80 remote with all the bells & whistle you could ever dream of. Go to the product page to read more: https://labs.frostbox.net/products/a80-remote-system/
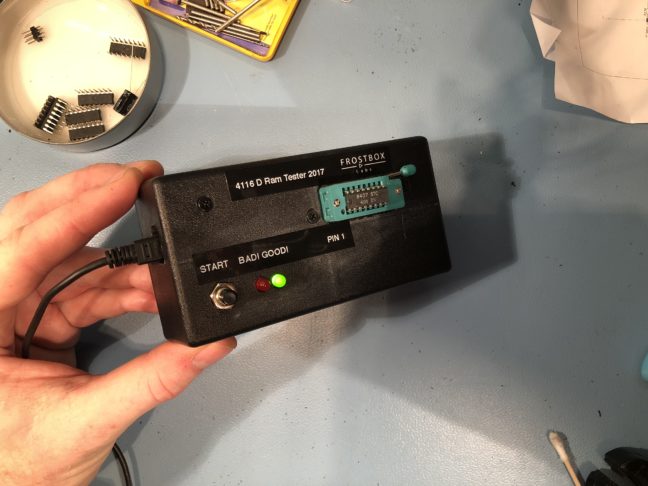
After several requests I finally got around to finish documenting an old project from the fall 2017. The ancient computer in our Solid State Logic SL4064G+ console uses a lot of 4116 D Ram which are known to go bad. Therefor I needed a way to check which IC is bad when I see a graphic error on the SSL computer screen. I looked around on the internet and found this post on a project designing a D ram tester for a different kind of D ram. Based on this design a made a version for the 4116 type D ram and reused most of the arduino code.
Please let me know if you find any errors in these attachements, thanks!
UPDATE 3: Thanks to Sleepwalker3 again for making comments about another bug. I have uploaded af fixed version of the code ei. version 3.
UPDATE 2: Thanks to Rauno and Sleepwalker3 for making comments about a very seriously bug which meant only RAM address 0 was checked. I have uploaded af fixed version of the code ei. version 2.
UPDATE: The initial schematic had errors in the inverting circuit for the -5vdc. Sorry. Below is a link to the corrected rev2 version:
Download the rev2 schematic here: 4116_tester_schematic
Download the arduino version 2 code here: 4116_tester_ulh.ino
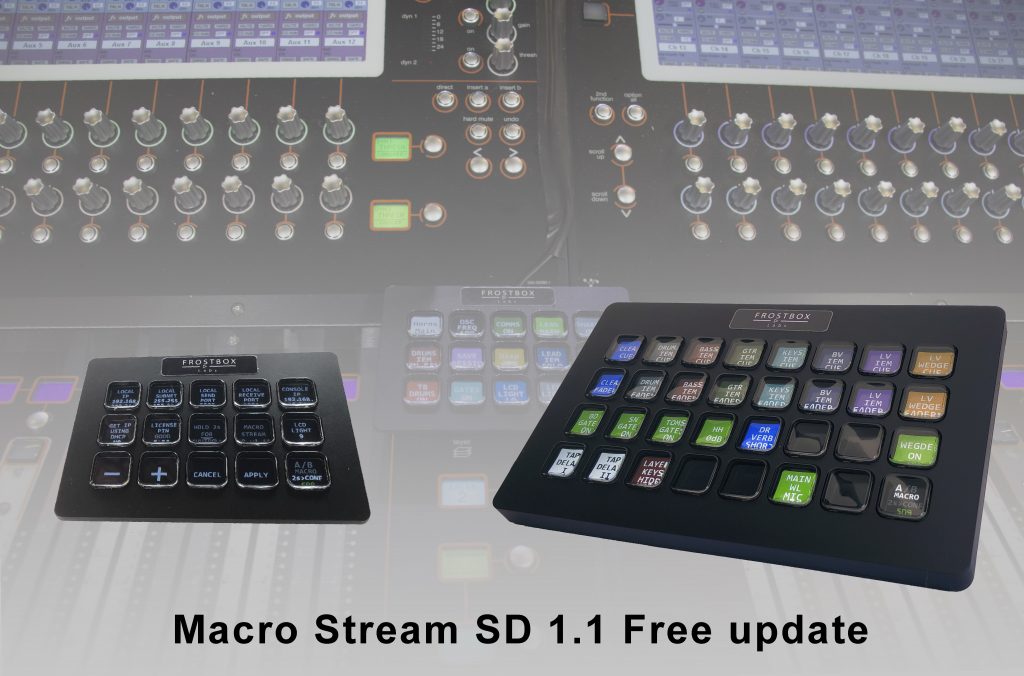
The third release provides support for the Stream Deck revision 2 also known as model number 20GAA9902. This unit looks identical to the original Stream Deck (model number 20GAA9901) but inside uses another communication protocol that is now supported with this release. This is the one and only change from version 1.1 and therefore only an important update for users of this particular unit. Check out the product page here.

UPDATE APRIL 2020:
New video added that runs through the entire configuration.
This method can also be used with the normal digico macro buttons and no Macro Stream SD
>>>>>>>>>>>>>>>>>>>>>>>>>
In this blog post I describe how to use the Macro Stream SD to send OSC messages to external equipment and computers on the network through the DiGiCo SD console for example controlling the transport of a virtuel soundcheck DAW.
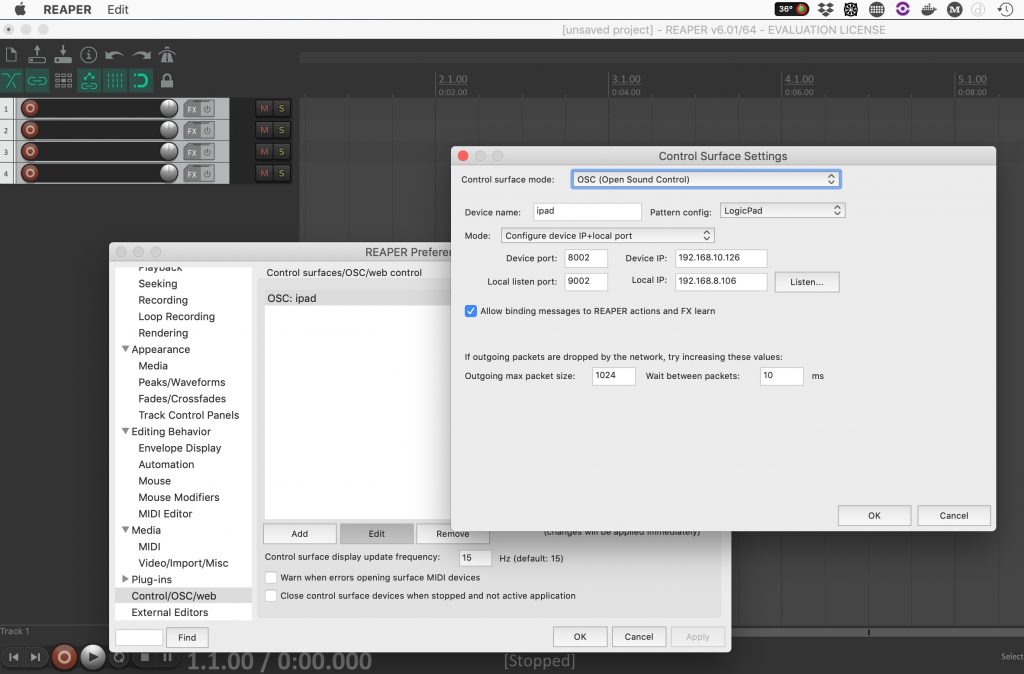
Using the Input channel controllers generic OSC under External Control I was able to send commands to my Reaper that is the daw I use for virtuel soundcheck. This is only a one way solution sending a macro command from the Macro Stream to the DiGiCo SD and then this console passes it to the target device – Reaper DAW in my case. Follow the screen shots and the details below. This procedure only allows OSC messages one way from det Macro Stream through the console and then terminates at the OSC receiver.
Click here for more info on the Macro Stream
Have fun!
Regards,
Uffe
1: On the DiGiCo SD main screen open the “External Control”-window in the most right drop down menu “Setup”.
2: Now setup the macro stream in the external control as and DiGiCo pad device and make sure the connection works with macros as normal.
3: Then set up the “other OSC” device ie. in my instance the ip of my mac running Reaper. Remember to use different send and receive ports.
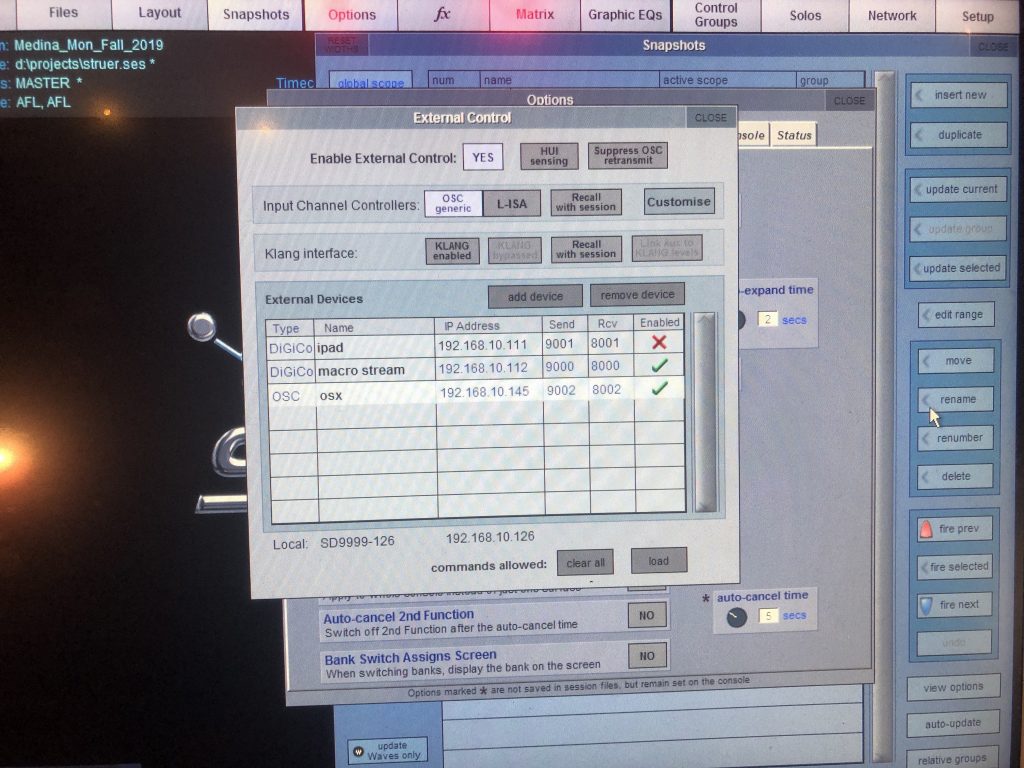
4: Now configure the “Input Channel Controllers” by hitting the “Customize” button.
5: Here you can define the specific OSC parameters to call according to the OSC implementation in the target device (ie. Reaper)
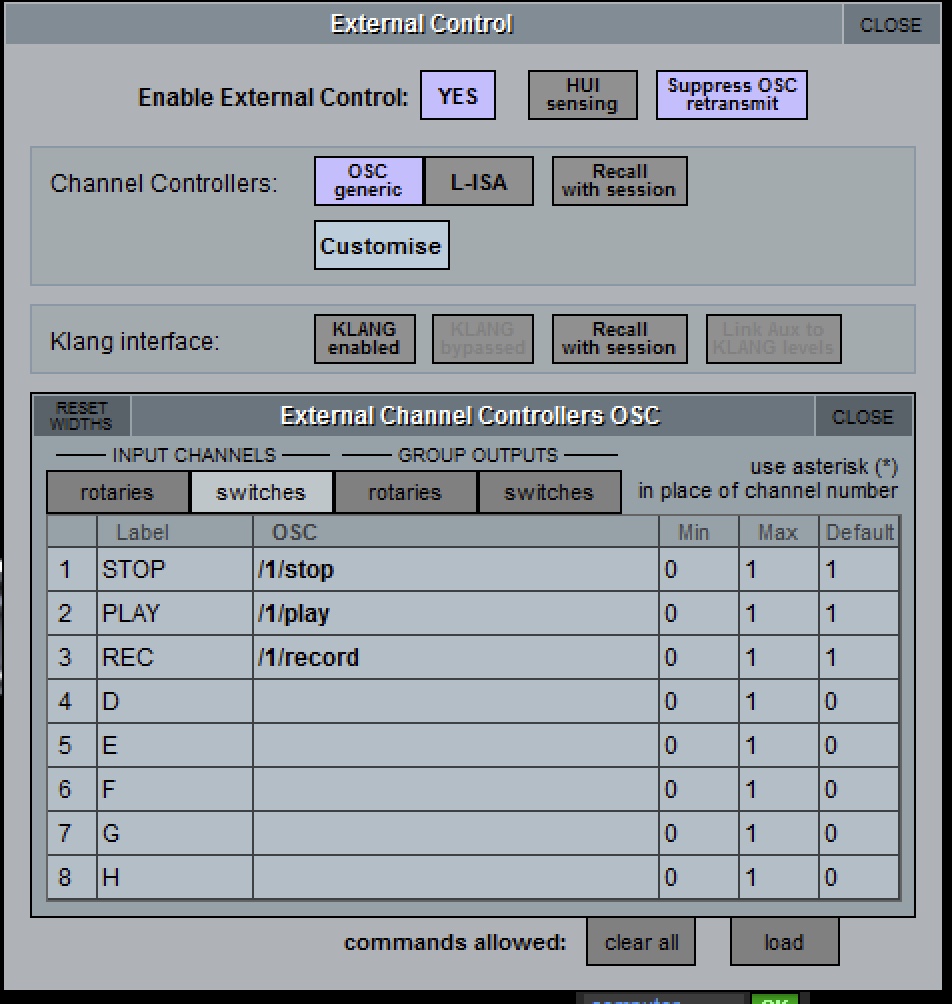
6: Now you just need to create the macro that activates the Input Channel Control function you just defined. Under “Command Type” chose “Inout Channels” and under commands scroll almost all the way down to “rotary A – button A – rotary B – …” and chose the one you used when defining the osc parameters under step 5. To get it to send out a 1 as the OSC payload create two lines. The first with the off button state and the second with the one button state.
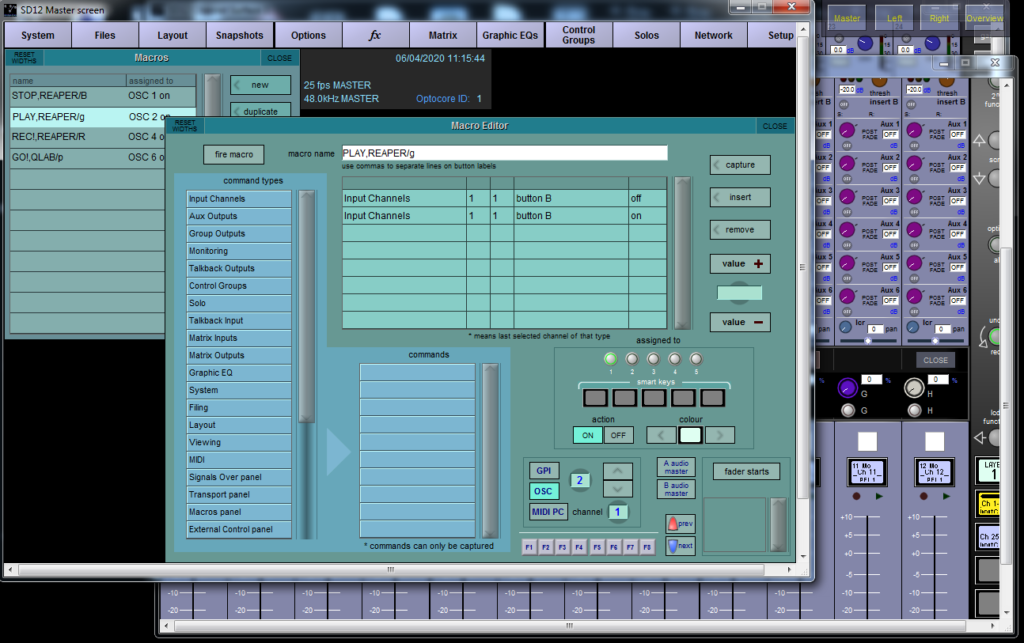
7: Activate the osc target software (in reaper you need to add and OSC implementation).
8: Test and make sure it works 🙂
The new release adds support for Raspberry Pi 4b and Stream Deck XL. It also boost the performances of the UI. If you are a current user keep an eye on your email for a download link.
This website uses cookies. By continuing to use this site, you accept our use of cookies.